Wednesday, January 23, 2019

Plant-Based Spaghetti Carbonara with Tempeh Bacon and Sweet Potato Spirals

Indulge in this plant-based take on carbonara to your heart's content


This recipe is super quick and easy to make and recreate in your own kitchen for a fast 30-minute weeknight dinner when the last thing you want to do is cook and you wish you were more into meal-prepping. 

The carbonara recipe is the result of playing around with the ingredients in my kitchen and mixing together different recipes. I got the seasoning recipe for the tempeh bacon from my wonderful Christmas present, the Fresh Cookbook. I changed a few things because I did not have all the ingredients in my kitchen so I will add it seasoning mixture to the recipe below as well.

I would 100% recommend including sweet potatoes into your version of this recipe. If you don't have a spiralizer, simply chop the sweet potatoes into little cubes or thin slices. The sweetness is the perfect balance with the savory tempeh bacon. But basically, the sweet potatoes are non-negotiable in my opinion!

So, without further delay, let's make some plant-based pasta! And as a reminder, like all of my recipes, the amounts are for approximately two people or for a single person plus leftovers, so adjust accordingly.

Cashews soaked in hot water, spiraled sweet potatoes, and marinated tempeh bacon

Prep Time: 10 min | Cook Time: 20 min | Total Time: 30 min | Serves: 1-2


Ingredients:

Tempeh Bacon:
  • Half a block of tempeh 
  • 1 Tbsp paprika (smoked paprika would also work well)
  • 1 1/2 Tbsp garlic powder 
  • 1/4 maple syrup 
  • 1/4 soy sauce (or tamari) 
  • 1/4 olive oil

Carbonara Sauce:
  • 1/2 cup plain cashews - soaked for at least 30 mintues.  
  • 1/2-1 cup water 
  • 1/2 cup nut milk of choice
  • 1 Egg (optional) 
  • 1 garlic clove 
  • 1/2 a white onion 
  • 4 Tbsp Olive oil or coconut oil for frying

Other:
  • Pasta of choice - I used a quinoa rice spaghetti and the amount depends on how many people you are cooking for. 
  • 1/2 a sweet potato - peeled and spiraled 
  • Parsley for garnish 
  • Plant-based parmesan for garnish


Instructions:

Prep and Bacon:
  1. Chop a clove of garlic and half an onion. 
  2. Spiral half a sweet potato (or chop into small cubes or slices).  
  3. Make the bacon seasoning by mixing everything together, cut the tempeh into slices, and pour the seasoning over top of the tempeh slices. Let it marinate for at least 10 minutes. 
    • Optional: prepare the marinade the night or morning before and let the tempeh soak longer. 
  4. Once steps 1-3 are prepared, boil water and begin to cook the pasta. Then start with the sauce.
Carbonara Sauce:
  1. Place the garlic, onion, and olive oil/coconut oil in a large pan at medium heat. 
  2. Meanwhile, place the cashews, water, and nut milk of choice in a blender or food processor and blend, to create a thick milk consistency.
  3. If you want, add a beaten egg to the cashew sauce, and mix together.  Set the cashew sauce aside. 
  4. Fry the marinated tempeh bacon pieces in the frying pan until both sides look brown and cooked through. (The purpose of this is to heat the tempeh up and allow the marinade to stick to the tempeh.)
  5. Remove the tempeh strips from the pan onto a plate. Cut the tempeh into small bite-sized pieces. 
  6. In the pan, add the sweet potatoes. If necessary, add a bit of water, nut milk, or oil to prevent sticking. 
  7. Add the cashew sauce to the sweet potatoes and stir around.
  8. Add the tempeh bacon back into the pan and stir. 
  9. At this point, the pasta should be done. Drain the pasta and add it to the pan. 
  10. Stir all the ingredients together until combined and the sauce is covering everything. 
  11. Garnish with some plant-based parmesan and parsley.

Now, all there's left to do is enjoy! Share your meal pictures with me or any alterations you made!


SHARE:

Sunday, December 2, 2018

Sweet Sticky Sesame Cauliflower

A healthy take on a delicious original 


I am going to make this short and sweet, much like this meal! This is the perfect healthy version of the delicious take-out original sesame chicken. This recipe is mostly plant-based... I say 'mostly" because I am using processed ingredients like soy sauce and sriracha for the sauce. You can, of course, adapt the recipe to your dietary needs! If you do, please share your version with me so I can try it too!

Prep Time: 5 min | Cook Time: 35 minutes | Serves: 1-2 

As always, my recipes are for all the single people because the recipes I share are the ones I have made myself, and generally, I am cooking solo! I say it serves 1-2 because I generally make enough for dinner and lunch the next day for myself. Yes please, leftovers! So if you are cooking dinner for two people and are only wanting enough for dinner, these measurements should be good. 

Ingredients 

Rice Base: 
  • 1 cup of rice (white or brown both work, but jasmine goes best with the "sticky" part of this meal)
Breaded Cauliflower:
  •  Half head of cauliflower, cut into pieces. Choose the size that suits you best.
  • 1 cup coconut flour (using 1/2 twice)
  • 1/4 tapioca flour 
  • 1/2 warm water water 
  • 1 tsp garlic powder 
  • 1 tsp onion powder 
  • 1 tsp coriander powder
  • 1 tsp salt 
  • 1/2 tsp pepper  
  • 2 Tbsp olive oil 
Sticky Sauce: 
  • 4 Tbsp Sesame oil 
  • 1/4 Maple syrup
  • 1/2 Soy sauce 
  • 1 Tbsp Sriracha sauce
  • 2 cloves of galic chopped
  • 1/2 tbsp ginger chopped
  • 1/4 tsp Chili flakes or to taste
  • Sesame seeds for garnish 
  • Chopped scallions for garnish 
  • Coriander for garnish

Instructions  
  1. Preheat the oven to 350°F (or 180°C.
  2. Start cooking 1 cup of rice so that it is done at the same time as the cauliflower. 
  3. In one bowl, combine 1/4 tapioca flour, 1/2 cup of the coconut flour, and 1/2 warm water and stir until slightly thick. It will not be really thick because the tapioca somewhat dissolves, but the tapioca will give the cauliflower breading a nice chewy taste.
  4. In the second bowl, pour the other 1/2 cup of coconut flour and mix in the garlic powder, onion powder, coriander powder, salt, and pepper. 
  5. Prepare a sheet pan and take your pieces of cauliflower, dipping them into the wet flour mixture, then into the dry flour mixture, and then placing them onto the pan. 
  6.  Drizzle one tbsp of the olive oil overtop of the breaded cauliflower before putting the cauliflower in the oven for 10 minutes.
  7. After 10 minutes, turn the cauliflower over and added the second tbsp of olive oil. Bake for another 10 minutes.
  8. While the cauliflower is in the oven, make the sticky sauce. 
  9. Put the sesame oil, garlic, and ginger in a small saucepan on medium heat until it simmers. 
  10. Add the soy sauce, maple syrup, and sriracha. Sprinkle in some chili flakes if you like it hot.  
  11. Keep simmering the sauce until it thickens slightly. 
  12. After the cauliflower has baked for 10 minutes on each side, pour all but about a 1/4 of the sauce over the cauliflower. 
  13. Mix the cauliflower around in the sauce and then put them back in the oven for 3-5 minutes. 

Take the cauliflower out of the oven, put the rice in a bowl as the base and add the stick cauliflower. Pour the extra stick sauce overtop and garnish with sesame seeds, coriander (if you are a coriander lover!) and chopped scallions. This dish is best served immediately, but I still enjoyed my leftovers the next day!


SHARE:

Wednesday, November 21, 2018

Zero-Waste Household Must-Haves

Top Nine Must-haves to go out and get right now!

It seems to me that people are slowly becoming more aware of the zero-waste movement, the importance of sustainability research, and the effects on the environment. In the spirit of that, I thought I would share my top nine sustainable household item must-haves that I have at hand and consider to be life-savers!

A little note
I think the zero-waste movement is incredibly important and I really support all of the awareness that is being raised, and I also believe that every little bit counts. Having said that, I would like to add one small little note. I am deep in my studies and one of the things we often discuss in a theoretical-based field is the issue of placing responsibility on the individual when the issue is really a structural one.

To clarify, the issue is that plastic is being mass-produced, and industries and mass companies like grocery stores are one of the main wasters of plastic and other non-compostable materials. Instead of looking at the structures in society that enforce pollution and waste, we turn to individuals and put the responsibility on them to not use plastic, even if that's often the only thing available. It is beneficial and makes a difference when individuals stop buying plastic water bottles and cease using new plastic bags from the grocery store each time they go shopping.

However, this becomes a problem when, for other structural reasons, people are unable to contribute to the movement out of their financial situation or socio-economic location. I would simply like to create some consciousness around this inequality and the danger of making individuals responsible for problems that are bigger than they are. Additionally, I also want to acknowledge that not everyone can afford to have zero-waste products, and the purpose of this post is to simply share what I love and endorse as opposed to shaming those who are unable to have these things. If you are able to afford all these wonderful zero-waste products, go get them! What are you waiting for!?

1. Metal Straws 


Metal straws are GAME CHANGERS. Let me say that again. Metal straws will change your life. Not only are you not putting the plastic particles in your body but your also not throwing plastic straws into the oceans (maybe not literally, but pretty much). I got this set of four which came with one straw cleaning brush. If you live with more people or just want a whole bunch of metal straws, you can buy them in larger sets too.

2. Wax Paper 

 
This wax paper honestly makes me so happy. I got my first wrapping wax paper from Abeego and I love it. Wax paper works like magic. I  recently went to a vegan festival and got some more wax paper from Earthology in these beautiful patterns. How can you not want to support the environment when your lunch wrap has the ability to make you happy?!

3. Mesh Produce Bags 

 
These are life-savers. They hold food for longer than plastic bags do, and you save the environment by not using all those plastic bags at the produce section of the grocery store. I got mine as a gift, but these from Kmool are exactly the same. I highly suggest getting different sizes, like with the wax paper, so that you can divide up your produce.

4. Non-Plastic Waterbottle 


Plastic is not only harmful to the environment but using plastic products to store our food or drinks can harm the contents we are consuming as the plastic particles seep into them, and in turn, they can harm us. Anyways, enough "science" from me. To move away from plastic water bottles I got this amazing silicon waterbottle. Metal water bottles work too but I love the silicon. Silicon is lighter and see-through which also makes it easy to wash. I take the water bottle with me EVERYWHERE (literally.)! It's from 720°Degree, and you can get the bottles in various different sizes and colors. It was the best thing I bought on this entire list because now I only have this one great bottle as opposed to five shitty ones.

5. Biodegradable Pela Phone Case 


When I stumbled across Pela Cases I knew what everyone was getting from me as their next birthday or Christmas present. Pela is a Vancouver based company, producing biodegradable phone cases. The cases are long lasting and when you are done with it, you simply throw it in the compost and it will break down. Amazing!

6. Jars 


This one costs you nothing. Simply wash and reuse jars from food products you've bought. Old salsa or pickle jars are just two great examples of glass jars you can reuse. Putting these jars to good use will also encourage you to buy glass packaged products as opposed to plastic!

7. Stasherbag or Re-zip

I must admit, I do not have my own stasher bag or reusable zip lock yet. I am obsessed but haven't been able to find one that works for my shipping situation. But this is definitely next on my short list of buys!

8. Reusable make-up cloths


This one is more of a "cute" thing. I guess if you really wanted to you could just use a small cloth towel to remove your makeup... but i mean, how cute are these little guys!? I got mine from the vegan festival but you can find multiple versions on Amazon too! I got a pack of 10, and each pad has at least two uses (front and back side), if not more depending on how much make-up you are wearing. After its dirty, you just throw it in the laundry and then start all over again!

9. Bamboo Toothbrush 


This one is kind of just a no-brainer... you can buy these in packs of four or more and share with all your loved ones! We go through toothbrushes so quickly, adding to the mass amounts of plastic ending up in landfills. Here is one pack of 10 ... really there is just no wrong answer here.

 
Share your favorite zero-waste items with me and fill me in on all the other cool eco-friendly products that are out there! I would love to hear if you ended up purchasing a new zero-waste product after reading this post!


SHARE:

Friday, November 2, 2018

Plantbased Pumpkin Alfredo Linguini

The Perfect healthy comfort food for that crisp cold fall day 

This is probably one of my favorite new pasta recipes EVER. It is not my own creation but I was inspired by a similar recipe from Choosing Chia, and I was not planning on sharing it because of that. But I have recreated it to my own liking and tastes and I love it so much I need to share it!

I will confess I am not the biggest lover of pumpkin but the texture of it works so well in recreating an alfredo! I do still like pumpkin, but I did not put too much in so it would not overpower the flavour of the meal. If you love pumpkin, by all means, add more than what I have suggested in the recipe. This is a kind of recipe where you can really make it your own and play with amounts to get the saucy texture right if that's what your heart is desiring. If you add a bit more pumpkin purreé, add some more plant milk to thin it out.

This meal literally took me 15 minutes to make. You blend the cashew cream and add it to a pan of fried onions and garlic and mix in the pumpkin pureè and spices. I have written down two servings for this recipe because I am cooking for myself but this is also the perfect recipe to have for leftovers ... just make sure you make enough otherwise you might end up eating it all right away. Queue the stomach ache.

Calling all pasta lovers!
I have really been into figuring out and experimenting with all the fun and delicious plant-based pasta recipes! I stopped loving pasta for a while (believe it or not) because I was so used to making it with shrimp or chicken. But I'm slowly realizing that there are even more options and ways to make pasta now! I'm in heaven. So if you love pasta as much as I do (or whatever amount you love it - everyone is welcome), keep your eyes peeled because I have a few more recipes I will be posting shortly!

Recipe: Total time 15 min · Serves 1-2


Ingredients 
  • TBSP olive oil 
  • 2 garlic cloves chopped
  • 1/2 an onion chopped
  • 1/2 non-salted cashews 
  • 1 cup water 
  • 1 cup plant-based milk
  • 1/2 pumpkin purée
  • TBSP cinnamon 
  • 1/4 Tsp nutmeg 
  • Salt and pepper to taste
  • Linguini or Spaghetti - enough for 2 servings 
  • Plant-based parmesan or a tbsp of nutritional yeast to throw into the sauce before adding the pasta
 Directions
  1. Let the 1/2 of cashews soak in water for at least 20 minutes. I would recommend putting them in water in the morning so they have soaked all day by the time you come home to make your yummy dinner! 
  2. Boil water and cook your pasta of choice. 
  3. Drain the cashews and add them to the blender with 1 cup plant milk and 1 cup water. Blend until smooth and creamy. Note: it will be a light cream, not a heavy one.
  4.  Add the TBSP of olive oil to a pan on medium high head and add the chopped onions and garlic to the pan. Let them simmer for about 1 minute.
  5. Add the cashew cream from the blender and mix in the 1/2 cup of pumpkin purée. 
  6. Once everything is mixed together, add in the nutmeg, cinnamon, salt and pepper.
  7. I also added some of my plant-based parmesan to the sauce to contribute to the texture and add to the "salty-ness" of the dish. 
  8. Drain the pasta and add it to the sauce. 
  9. Top the dish off with some pepper and plant-based parmesan and voila! 

I hope you fall in love with this easy plant-based pasta the way I have and please share your own creations or any changes you've made to create your own special version!

SHARE:

Friday, October 19, 2018

Morning Oats with Caramalized Banana's

Your New Favorite Oatmeal Topping

 A healthy plant-based way to sweeten up your morning

I must confess, I'm not a huge breakfast person. If my mom didn't make smoothies for us in the morning when I was growing up, I think there would have been many mornings where breakfast would've have been skipped, not even a thought crossing my mind. I'm the kind of person who just isn't hungry that early in the morning - usually - and even if I am, my stomach is not capable of digesting a huge meal right off the bat.

Basically, the point of my story is that I got really into smoothies, and they are still my go-to standard breakfast. But, having smoothie after smoothie, day after day, sometimes gets a little boring and I need to switch it up. This switch-up usually only happens on weekends though, when I can wait to have breakfast a bit later when I'm actually hungry and I have the time to make a nice bowl of some sort.

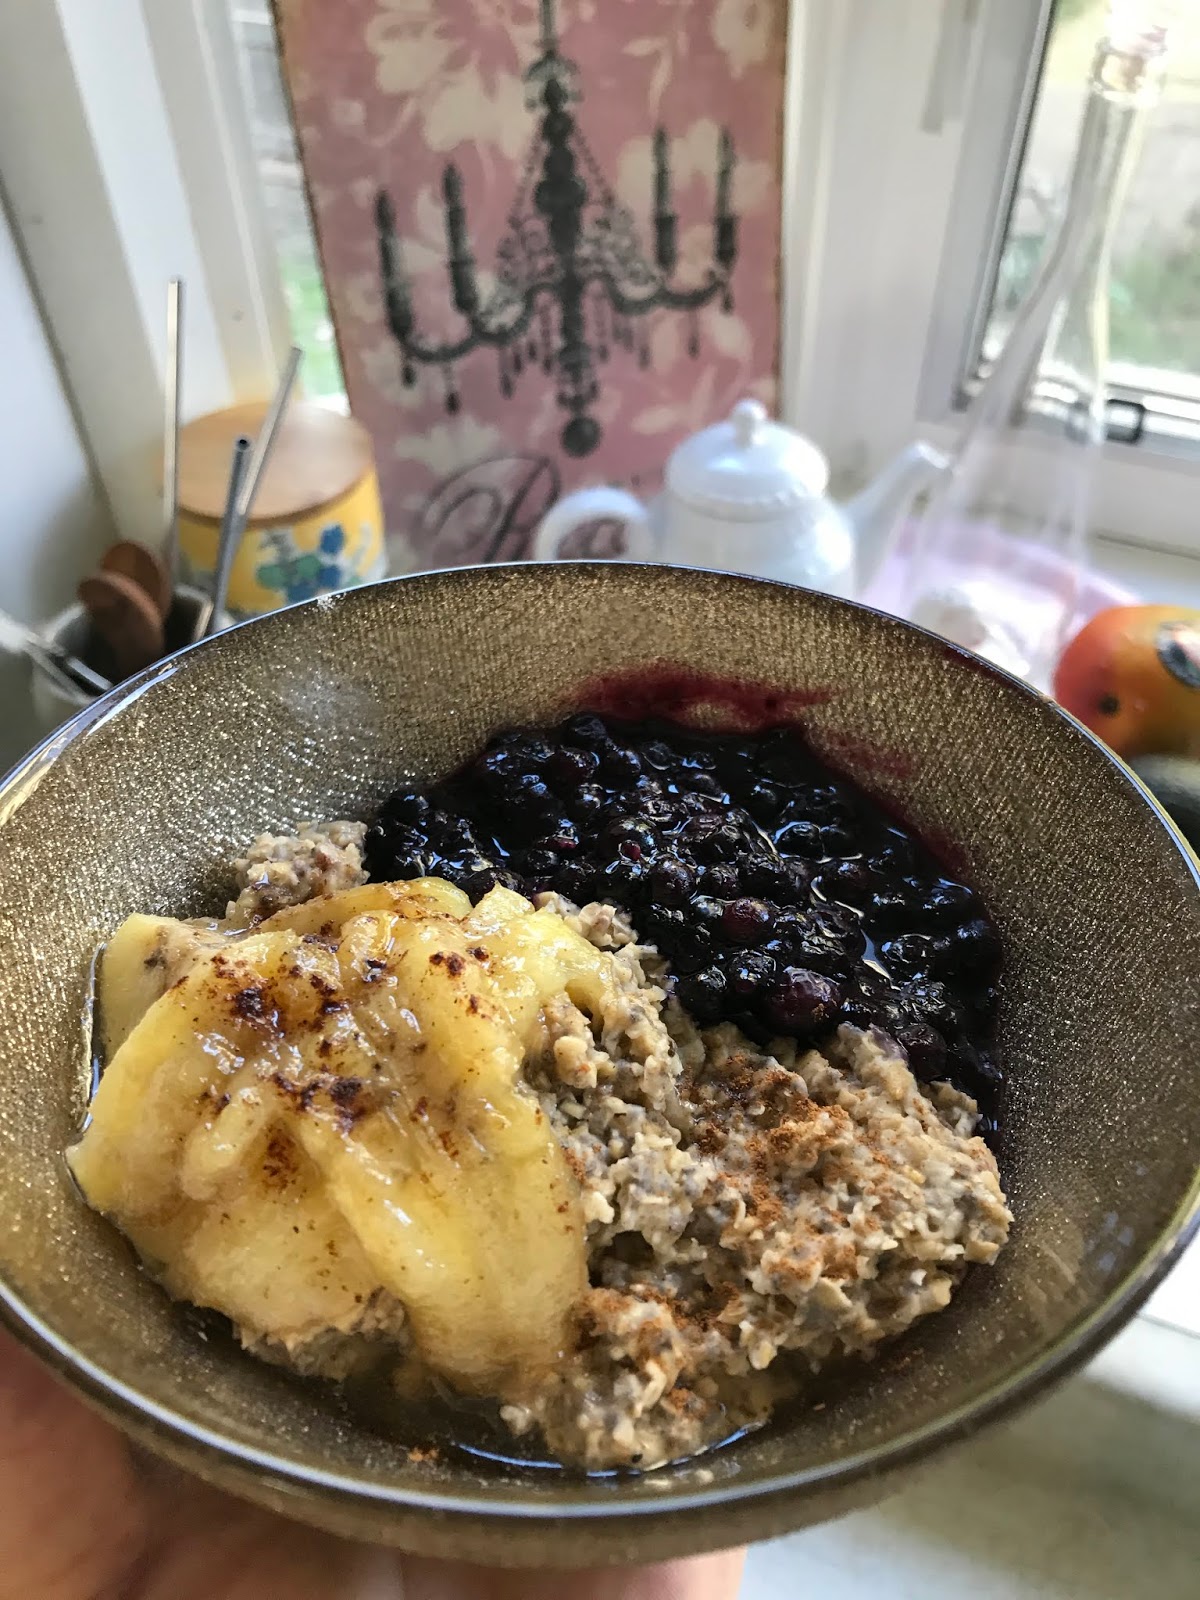
This oatmeal topped with caramelized bananas is one of my absolute favorites. I'm still not over it since I tried it the first time this summer. Even though it looks and tastes slightly more gourmet, it takes no time at all.

For the Oats 

You can make these however you like. My standard is simply putting a cup of steel cut oats in a pot and pouring almond milk in so that it covers the oats. I don't like my oatmeal dry but also not runny... so it needs to be just right! 

If I'm feeling it, I'll add some chia seeds to the oatmeal and almond milk too before it starts cooking. I also add cinnamon and nutmeg into the oatmeal while it cooks.

For the Caramelized Banana Topping

Total Time: 5 min
 
Ingredients:
  • One banana 
    • If you are making this for multiple people I would say one banana is probably good for two people, so based the quantity off of that. If I am making this for just myself, I sometimes use half a banana and sometimes a whole ... just depends on how much of it you want!
  • 1/4-1/2 cup date syrup OR maple syrup
  • 1 TBSP Coconut oil 
  • A handful of walnuts or pecans to your liking
Directions:
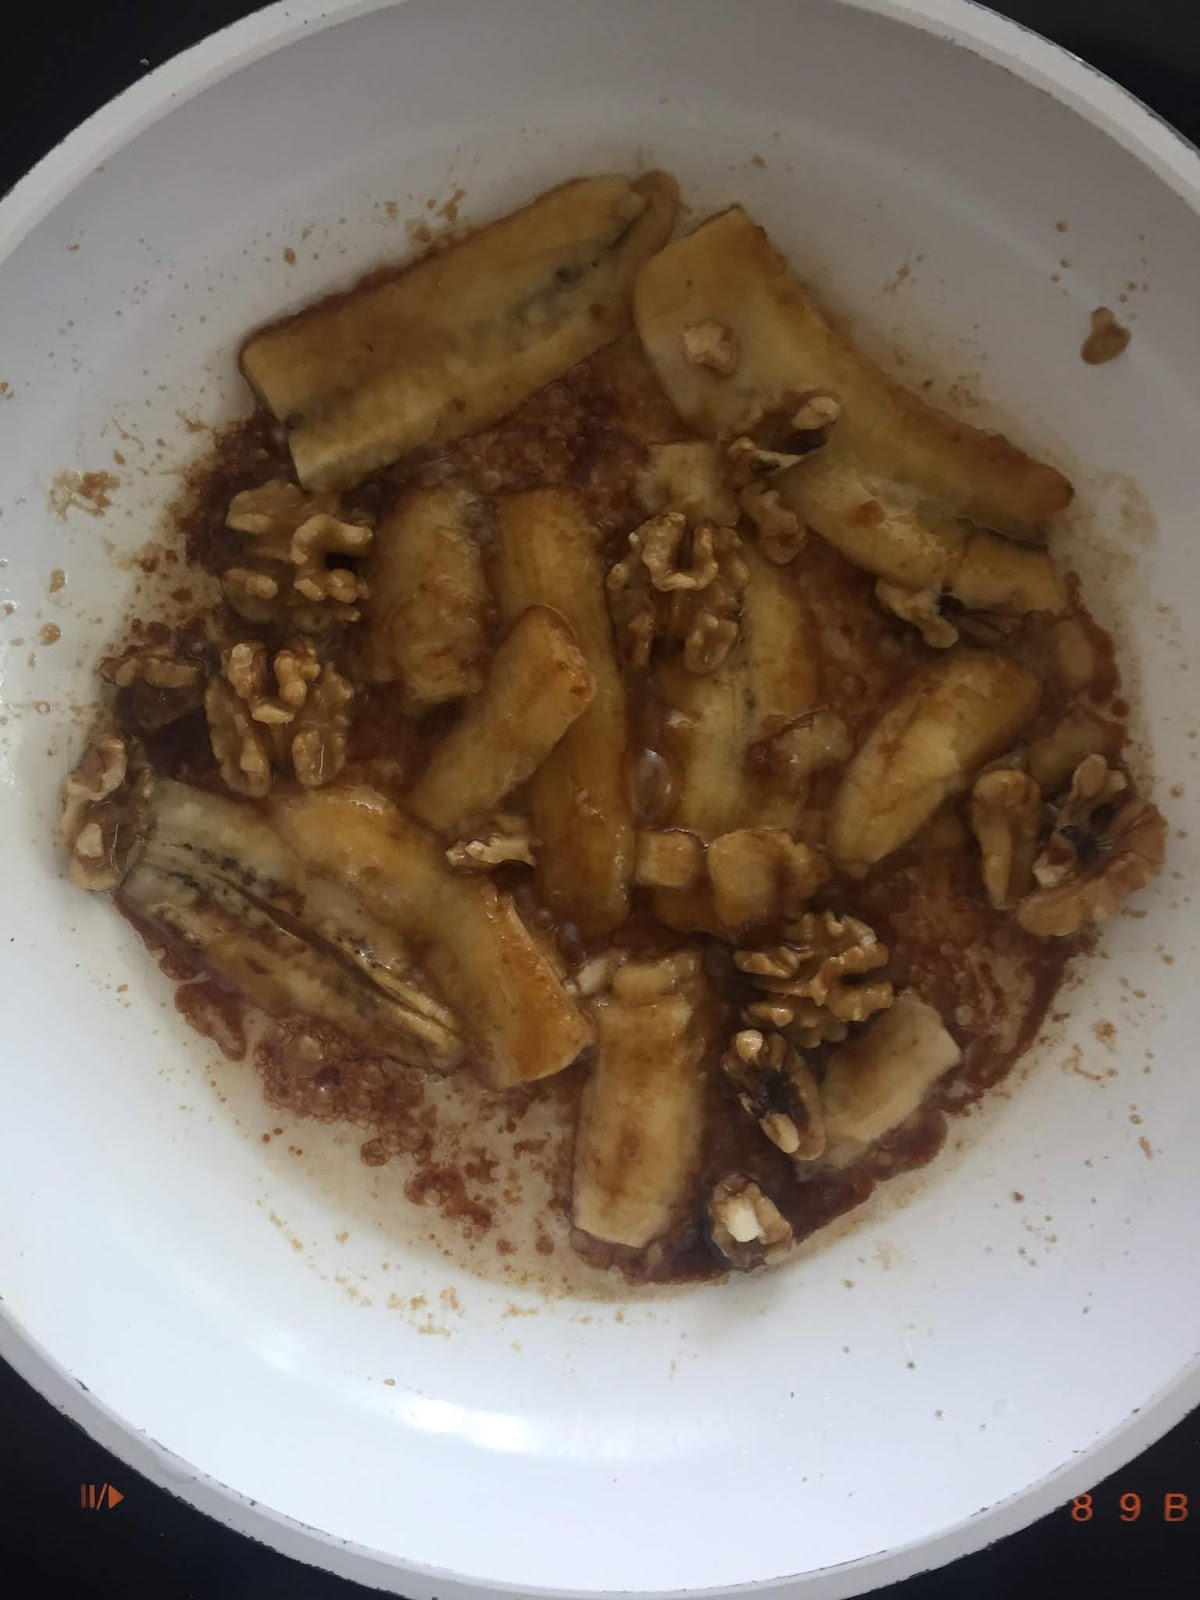
  1. Peel the bananas and cut them length-wise so that there is a large surface area
  2. Put about a TBSP of coconut oil in the pan on medium to high heat
  3. Pour half of the maple or date syrup into the pan
  4. Lay the bananas into the pan and add the walnuts or pecans and the remainder of the syrup

    Tip: you can add more syrup to your liking, more nuts or more bananas ... there is really nothing you can get wrong with this recipe!

Mix it all together ...

Put your cooked fluffy oatmeal into a bowl and then remove the bananas from the pan and into the bowl to top off your oatmeal! Drizzle the remainder of the caramelized syrup from the pan on top of the bananas and oatmeal.

Optional: You can add many other toppings to this oat bowl as well, like blueberry compote (just throw some frozen blueberries in a pot and let them heat up and thicken), coconut shavings, chia seeds (as a topping or to the oatmeal), some extra cinnamon, or anything else that your heart desires!


SHARE:

Friday, August 24, 2018

Five Minute Sweet Potato Sesame Toast Meal Prep

Plant-Based Alternative Toasts 

Welcome to the beginning of my plant-based healing journey. Due to health reasons with my digestion organs, I have decided to make the shift towards a more plant-based diet. One of the biggest issues I have struggled with in this regard is what I should do about lunch. My days are busy and I don't have time to be trying out different creations everyday. I need a simple sandwich type meal that I can make in 5 quick minutes, put in a Tupperware (glass of course!) and leave for the rest of my day. This is that sandwich! I am also slightly obsessed with all the things you can do with sweet potatoes... so there is a bit of a sweet potato overload happening right now!


Ingredients:
  • 1/2 a Sweet Potato
  • 1/2 Avocado
  • Tahini
  • Sesame seeds 
  • Whole Wheat Bread
  • Tsp Chopped Garlic
  • Spices: salt, pepper 

Directions:
  1.  Cut the sweet potato into chunks and spread out in a pan. 
  2. Drizzle olive oil onto the sweet potatoes and season them with about a tsp of salt, pepper, onion powder, and cayenne pepper.
  3. Put the sweet potatoes into the oven for 30 min at 350°F or 180°C. Check them at the 15 min mark and stir them. 
  4. When the sweet potatoes are finished, put a slice of bread in the toaster and mash the potatoes slightly with a fork (does not need to be puree... just make them merge together!) 
  5. Spread the slightly mashed sweet potatoes onto the toasted slice of bread. Add a drizzle of tahini, sesame seeds, and a avocado slices.
You can add whatever else you might like onto this toast... raw spinach would be yummy too for example! Let me know in what other combinations you have created!


SHARE:

Tuesday, July 31, 2018

'Sweet and Spicy' Sweet Potato and Black Bean Plant-Based Tacos

Plant-Based Lettuce Tacos with Sweet Potato Cubes, Spicy Black Bean Paste, and a Cilantro Mint Green Goddess Dressing 

Quick and Easy Three Step Process

This meal is a super quick, super easy week-night meal that is both a nutritious and healthy plant-based option! The three main steps of this meal are as follows: 1. the sweet potatoes, 2. the black bean paste, and 3. the green goddess dressing.

Time: 30 min with prep time
Serves: 4 - but easily adjusted!  

Step 1: Sweet Potatoes 

Ingredients:
  • 2-4 sweet potatoes (depending on how many people are eating - 1/2-1 sweet potato per person is a good measurement, so for 4 people, 4 sweet potatoes) 
  • Salt & Pepper to taste
  • 1TBSP Garlic
  • 1TBSP Cumin 
  • These measurements vary depending on how many sweet potatoes you use ... season to taste!

Directions: Start with the sweet potatoes
  1. Peel all the sweet potatoes and cut them into small cubes 
  2. Drizzel olive oil over top and season with the above herbs 
  3. Bake in the oven for 20 min at 180°C, until soft.

Step 2: Black Bean Paste 

Ingredients:
  • 1 can Black Beans 
  • 1 Big Onion 
  • 2 Garlic Cloves
  • 1TSP Ginger
  • 1TSP Hot chillies 

Directions: Do the black beans while the potatoes are in the oven.
  1. Wash and drain the can of beans.
  2. Satay the chopping onion, garlic, and ginger until soft.
  3. Put the beans in a blender and add the satayed onions/spice.
  4. Blend, but not fully. Leave some texture by not fully blending the beans into a complete paste.

Step 3: Greengoddess Dressing 

Ingredients:
  • Large handful cilantro
  • Large handful parsley 
  • 2 Garlic Cloves 
  • Half an avocado 
  • 1TBSP Lemon or Lime Juice 
  • 1/4 cup olive oil
  • 1/4-1/2 cup water (depending on how thin you want the sauce) 
  • Salt & Pepper to taste 

Directions: Make the dressing last, so it's as fresh as possible!
  1. Put all incredients into a blender or food processor and blend up.
  2. If its too thick, add some more water.
  3. Tip: the more garlic cloves you put in, the spicier it will be!

Other Ingredients 

  • Avacado - for toppings.
  • Tomatoes - for toppings 
  • 1 Head of Romaine lettuce 
  • Salsa - the cool taste is a nice contrast!


The Assembly 

  1. Take a leaf of the romaine lettuce. 
  2. Take a spoonful or two of the black bean paste and spread it across the middle of the lettuce like you would with a wrap. 
  3. Add the sweet potato cubes, acovaco slices, tomatoes, and whatever else you like to have as toppings. 
  4. Top with the green goddess dressing and some salsa. 
  5. ENJOY! 


I always love to add some extra sauce on the side because I need to have an equal amount of everything for every bite!

Like & comment to let me know how you made your own twist of this meal, or just simply enjoyed it this way! 


SHARE:

Saturday, November 18, 2017

Detox with Avocado Pesto and Zoodles

This homemade avocado pesto is a quick, easy, and delicious dips, sauce, and side to almost any dish you can think of...


This a such a yummy easy pesto to add to Zoodles (aka spiral Zucchini aka Zucchini noodles). It takes 5 minutes to make, and makes just enough that it does not go bad! 

Ingredients 

  • 1-2 Avocados
  • A handful of basil 
  • 1/2 cup parmesan (add to your taste) 
  • Teaspoon or 1 clove of garlic 
  • About a cup olive oil or avocado oil - this depends on how big your avocado(s) are
  • About a TBSP of lemon juice to keep the avocados fresh  
  • Pinch of Salt and Pepper 

The "how to" 

Mix it all in the blender! Quick and easy!
Add more olive oil if it is a bit thick, or basil or another avocado (or half) if its gotten too runny.
You can also add some more salt and pepper or parmesan to add to the taste... whatever suits your taste buds!

This is so easy, there is hardly anything to write about here. Just blend until pesto like!


If you are making the pesto with Zucchini noodles, which I highly recommend, spiral those babies and put some salt on them. Let them sit a while so that the moisture comes out a bit. Then, add your delicious fresh avocado pesto on top! Enjoy! 


SHARE:

Saturday, October 14, 2017

Morning Boost #5: Chia Kefir Superfood Porridge

Yet another fantastic and easy recipe to start your morning off stress-free and happy! 


This is a super easy breakfast that you can make before you go to bed and refrigerate over night, so that you have a ready-to-go healthy breakfast in the morning! 

Ingredients 

  • Kefir 
    • I like to choose a flavored one ... mango is my favorite and what I used in this morning boost! 
  • Fruit of your choice 
    • The fruit you can either add in the night before as well or in the morning. 
  • Chia seeds 
    • This is what makes this breakfast into a porridge consistency, when it sits overnight 
  • Hemp Hearts
  • Steel Cut Oats (or normal oats if you prefer) 
  • Coca Coconut Powder
  • Goji Berry Superfood Powder 

The last two powders are just suggestions of what I like to include, but you can choose to leave them out or add some other superfood mixture as well ... if you do, let me know how you made it your own! 

What is most important to include is the chia seeds, because those soak up the  

The "how to" Part

As mentioned before, this is a super easy breakfast to prep. Essentially, pour the bowl full about 3/4 with the Kefir of your choice. Add the chia seeds, hemp hearts, steel cut oats, and whatever else you would like to include! 

Stir until completely mixed! 

You can either add the fruits in now or wait until the morning. 


Once you have added everything your breakfast heart desires, put the bowl in the fridge to refrigerate overnight, and you'll be ready to go when you wake up! 


Enjoy this wonderful start to your day! 

SHARE:

Friday, August 11, 2017

Morning Boost #4: Ginger Turmeric Kefir Lassi

This smoothie is the perfect combination of sweet, spicy, and healthy to kick-start your fabulous day! 

What is this amazing sounding drink you ask?

As I said, this one is sweet from the honey and pineapple, spicy from the ginger, and contains a hint of sourness from the lemon. Aside from those different tastes, it is also creamy from Kefir… Sounding delicious yet? Kefir, if you haven’t heard of it yet, is a type of probiotic yogurt drink.

This is a great one when you are feeling a bit sick, with nausea or simply under the weather. It contains ingredients such as probiotic yogurt which is great for healing and strengthening intestines, as well as ginger, which is helpful for unsettled stomachs, menstrual pain, and fighting cases of flu and common colds (HealthLine 2017). This smoothie also contains honey, which is a natural antibiotic according to Medical News Today and can also be used as a cold relief.

Benefits of Turmeric

I myself had not heard about all the benefits of turmeric before making this smoothie with my mom. I feel that knowing what good you are actually doing with the food you put into your body always gives me a positive mindset. If I feel like I am putting kick-ass nutrients into my body, then I feel so much better. Therefore, I like to know the benefits of the natural spices, oils, and whatever else it may be that I am using for my body.

Turmeric is a spice grown in many Asian countries and belongs to the ginger family, so it has a bit of a similar “bite” tastes!

Benefits Include:
  • Cancer preventing elements: According to Cancer Research UK, the main ingredient in Turmeric is “curcumin” (scientifically known as diferuloyl methane), which has shown to have anticancer effects on cancer cells.
  • The Curcumin acts as an anti-oxidant and is also known for its powerful anti-inflammatory. Therefore, it can act as a natural pain killer (HealthLine 2017). 
  • Can slow the growth of brain diseases such as Alzheimer's: According to Health Line, Turmeric is known to boost the level of a growth hormone in the brain (Brain-Derived Neurotrophic Factor (BDNF)), which is linked to improved brain function. Alzheimer's, for example, is linked to the decrease of this hormone in the brain. Therefore, it could be a factor in preventing Alzheimer's. 

 Ingredients 

Side Note: This recipe has been adapted from my amazing mom, and she adapted it from the wonderful smoothie book Delicious Probiotic Drinks by Julia Mueller, where the information and benefits on all the ingredients and more healthy recipes if you're interested.


Ingredient Information
  • Kefir can also be substituted for plain probiotic yogurt
  • It is optional to add coconut water (approx. 1/4 cup to liquify the smoothie a bit and add the coconut taste, which can be really nice as it evens out all the strong tastes (just like the Kefir does as well)).
Single Step: Blend Well! 
Again, as most of my recipes go, you simply put it all in a blender and mix it together!
Pour into a glass and it is optional to garnish the drink with extra turmeric.

Servings
When I made this recipe originally (and for this post), it served about three people, but the amounts given will also work for two. To make this for one person, half this recipe. In that case, the recipe will make one good glass with a little left over to refill… you'll be wanting that extra bit.


And then you are left with a delicious morning smoothie boost with numerous healthy ingredients! Drink up!

Feeling too busy for healthy foods? Get rid of that excuse... here are some prep ideas:

This is a pretty easy recipe to prep for ahead of time. For example, if you don't have time to be cutting up pineapple in the morning, cut it up the night before and put it in a tupperware or in the freezer if you know you won't finish it this week anymore. Chop up the ginger and have a full jar at hand! Ginder is great to throw in with your tea or water, so you can never really have too much.

Start the morning and continue your day feeling full, healthy, and energized!


SHARE:

Saturday, July 29, 2017

Morning Boost #3: Banana Chocolate Nicecream

A Cold Refreshing Treat for a Hot Morning


Heres another super easy morning boost! I have only recently heard about nicecream and just started getting into it. It's basically like a smoothie bowl but in some cases almost easier to make!
This is a really simple recipe to get you hooked on this heavenly nicecream!

Ingredients + the ONE step required by this recipe

Frozen Bananas - 1-2 bananas or a good handful of frozen pieces should be enough.
Bananas are a great base ingredient because when you blend frozen bananas they become so thick and creamy … just like ice cream… almost better!

Almond milk - just a little bit to help blend the bananas; about 1/2 a cup.


Make it Yours! 
You can also play around here and add some other ingredients, for example, natural peanut butter or almond butter if you want to make it a banana peanut butter nicecream bowl!

THIS IS LITERALLY IT - Blend until Creamy! 


Toppings

This is where the fun starts. Toppings are important because it will give you the taste you want! I'm going for a little bit of a chocolate banana taste, so I'm adding some granola, chocolate peanut-butter sauce, and some shredded coconut! YUM!

Fruits
Add different fruits or the same kind of fruit as a topping to incorporate other flavors and textures. I’ve stuck with banana’s here but raspberries or strawberries would have been fitting to add to the chocolate sauce.

Granola
I am using “Nutty Rawnola”, a recipe by Earthy Andy. It is sweet, delicious, and vegan, with dates, cinnamon, oats, and coconut sugar!

Chocolate Peanut butter Sauce
And no, this does not contain sugar. Yes, it IS healthy AND delicious! This is a simple blended mixture of natural peanut butter, coconut milk, maple syrup, raw coca-powder.

Sprinkles
I’m not the biggest coconut fan, but I really do love using coconut oil or shreds for raw cooking and baking. I also like a little bit of shredded coconut onto of my smoothie bowls… it gives a crunchy texture and adds a little bit of a different flavor to mix things up!


And Voila! You are ready to enjoy your healthy breakfast treat in under 10 minutes! This is also a great cold snack on a hot summer day. 

There are tons of nicecream recipes online as well as lots of difficult ones that are delicious, but I thought I'd start off small to get into myself. I find that I am more motivated to continue doing something when I can make it the second time without following a recipe! But if you are looking for more of a challenge, go search it! I will also be posting some more of these in the weeks to come... they're my new fave!


SHARE:
© D3. All rights reserved.
Blogger Templates by pipdig